win10版本1903系統(tǒng)錯(cuò)誤0x80073701怎么辦
如果我們準(zhǔn)備將自己的win101903操作系統(tǒng)升級(jí)到更新的系統(tǒng)版本的話,過(guò)程中出現(xiàn)可錯(cuò)誤并且有代碼提示0x80073701,很多小伙伴不知道應(yīng)該怎么解決才可以正常升級(jí)版本。小編覺(jué)得我們可以通過(guò)在干凈啟動(dòng)中來(lái)排除自己系統(tǒng)的問(wèn)題,然后在進(jìn)行相關(guān)的修復(fù)即可。詳細(xì)步驟就來(lái)看下小編是怎么做的吧~
win10版本1903系統(tǒng)錯(cuò)誤0x80073701怎么辦0x80073701更新錯(cuò)誤,可能與您的更新組件缺失有關(guān)。
可以嘗試下方方法,手動(dòng)注冊(cè)Windows Update組件:
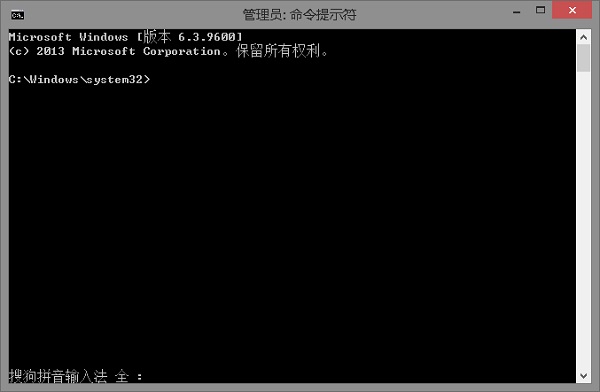
1、同時(shí)按【W(wǎng)in+X】鍵,點(diǎn)選【W(wǎng)indows PowerShell(管理員)】
2、拷貝下方的程序碼到剛打開(kāi)的PowerShell里面,按回車
3、忽略紅字錯(cuò)誤,重啟電腦。
4、運(yùn)行:
Windows Update
$arch = Get-WMIObject -Class Win32_Processor -ComputerName LocalHost | Select-Object AddressWidth
Write-Host '1. Stopping Windows Update Services...'
Stop-Service -Name BITS
Stop-Service -Name wuauserv
Stop-Service -Name appidsvc
Stop-Service -Name cryptsvc
Write-Host '2. Remove QMGR Data file...'
Remove-Item '$env:allusersprofileApplication DataMicrosoftNetworkDownloaderqmgr*.dat' -ErrorAction SilentlyContinue
Write-Host '3. Renaming the Software Distribution and CatRoot Folder...'
Rename-Item $env:systemrootSoftwareDistribution SoftwareDistribution.bak -ErrorAction SilentlyContinue
Rename-Item $env:systemrootSystem32Catroot2 catroot2.bak -ErrorAction SilentlyContinue
Write-Host '4. Removing old Windows Update log...'
Remove-Item $env:systemrootWindowsUpdate.log -ErrorAction SilentlyContinue
Write-Host '5. Resetting the Windows Update Services to defualt settings...'
'sc.exe sdset bits D:(A;;CCLCSWRPWPDTLOCRRC;;;SY)(A;;CCDCLCSWRPWPDTLOCRSDRCWDWO;;;BA)(A;;CCLCSWLOCRRC;;;AU)(A;;CCLCSWRPWPDTLOCRRC;;;PU)'
'sc.exe sdset wuauserv D:(A;;CCLCSWRPWPDTLOCRRC;;;SY)(A;;CCDCLCSWRPWPDTLOCRSDRCWDWO;;;BA)(A;;CCLCSWLOCRRC;;;AU)(A;;CCLCSWRPWPDTLOCRRC;;;PU)'
Set-Location $env:systemrootsystem32
Write-Host '6. Registering some DLLs...'
regsvr32.exe /s atl.dll
regsvr32.exe /s urlmon.dll
regsvr32.exe /s mshtml.dll
regsvr32.exe /s shdocvw.dll
regsvr32.exe /s browseui.dll
regsvr32.exe /s jscript.dll
regsvr32.exe /s vbscript.dll
regsvr32.exe /s scrrun.dll
regsvr32.exe /s msxml.dll
regsvr32.exe /s msxml3.dll
regsvr32.exe /s msxml6.dll
regsvr32.exe /s actxprxy.dll
regsvr32.exe /s softpub.dll
regsvr32.exe /s wintrust.dll
regsvr32.exe /s dssenh.dll
regsvr32.exe /s rsaenh.dll
regsvr32.exe /s gpkcsp.dll
regsvr32.exe /s sccbase.dll
regsvr32.exe /s slbcsp.dll
regsvr32.exe /s cryptdlg.dll
regsvr32.exe /s oleaut32.dll
regsvr32.exe /s ole32.dll
regsvr32.exe /s shell32.dll
regsvr32.exe /s initpki.dll
regsvr32.exe /s wuapi.dll
regsvr32.exe /s wuaueng.dll
regsvr32.exe /s wuaueng1.dll
regsvr32.exe /s wucltui.dll
regsvr32.exe /s wups.dll
regsvr32.exe /s wups2.dll
regsvr32.exe /s wuweb.dll
regsvr32.exe /s qmgr.dll
regsvr32.exe /s qmgrprxy.dll
regsvr32.exe /s wucltux.dll
regsvr32.exe /s muweb.dll
regsvr32.exe /s wuwebv.dll
Write-Host '7) Removing WSUS client settings...'
REG DELETE 'HKLMSOFTWAREMicrosoftWindowsCurrentVersionWindowsUpdate' /v AccountDomainSid /f
REG DELETE 'HKLMSOFTWAREMicrosoftWindowsCurrentVersionWindowsUpdate' /v PingID /f
REG DELETE 'HKLMSOFTWAREMicrosoftWindowsCurrentVersionWindowsUpdate' /v SusClientId /f
Write-Host '8) Resetting the WinSock...'
netsh winsock reset
netsh winhttp reset proxy
Write-Host '9) Delete all BITS jobs...'
Get-BitsTransfer | Remove-BitsTransfer
Write-Host '10) Attempting to install the Windows Update Agent...'
if($arch -eq 64){
wusa Windows8-RT-KB2937636-x64 /quiet
}
else{
wusa Windows8-RT-KB2937636-x86 /quiet
}
Write-Host '11) Starting Windows Update Services...'
Start-Service -Name BITS
Start-Service -Name wuauserv
Start-Service -Name appidsvc
Start-Service -Name cryptsvc
Write-Host '12) Forcing discovery...'
wuauclt /resetauthorization /detectnow
Write-Host 'Process complete. Please reboot your computer.'
5、運(yùn)行完成后,如果還是無(wú)法解決該問(wèn)題,請(qǐng)用戶們重裝系統(tǒng),以徹底解決此問(wèn)題。

win10系統(tǒng)鏡像
極速裝機(jī) 簡(jiǎn)單純凈
一鍵安裝教程
table tbody tr td button{background: #4E9FF7;border:none;border-radius: 4px;padding: 5px 16px;display: inline-block;vertical-align: text-top;}table tbody tr td button a{border:none;color: #fff;}詳情以上就是小編給各位小伙伴帶來(lái)的win10版本1903系統(tǒng)錯(cuò)誤0x80073701怎么辦的所有內(nèi)容,希望你們會(huì)喜歡。更多相關(guān)教程請(qǐng)收藏好吧啦網(wǎng)~
以上就是win10版本1903系統(tǒng)錯(cuò)誤0x80073701怎么辦的全部?jī)?nèi)容,望能這篇win10版本1903系統(tǒng)錯(cuò)誤0x80073701怎么辦可以幫助您解決問(wèn)題,能夠解決大家的實(shí)際問(wèn)題是好吧啦網(wǎng)一直努力的方向和目標(biāo)。
相關(guān)文章:
1. 如何純凈安裝win10系統(tǒng)?uefi模式下純凈安裝win10系統(tǒng)圖文教程2. 統(tǒng)信UOS個(gè)人版(V201030)正式發(fā)布 新增功能匯總3. Linux Mint系統(tǒng)怎么卸載程序? Linux卸載不需要應(yīng)用的技巧4. 微軟宣布將在1月10日結(jié)束對(duì)Win7/8/8.1版Edge瀏覽器的支持5. UOS系統(tǒng)怎么更新? UOS更新系統(tǒng)的圖文教程6. Windows 注冊(cè)表LastKey鍵值的設(shè)置技巧7. Mac版steam錯(cuò)誤代碼118怎么解決?Mac版steam錯(cuò)誤代碼118解決教程8. 如何在電腦PC上啟動(dòng)Windows11和Linux雙系統(tǒng)9. Win10系統(tǒng)360瀏覽器搜索引擎被劫持解決方法 10. 錄屏怎么保存gif動(dòng)圖? UOS錄屏生成Gif動(dòng)畫的技巧

 網(wǎng)公網(wǎng)安備