Spring Bean管理注解方式代碼實(shí)例
1.使用注解的方式需要配置applicationContext.xml:
<?xml version='1.0' encoding='UTF-8'?><beans xmlns='http://www.springframework.org/schema/beans' xmlns:xsi='http://www.w3.org/2001/XMLSchema-instance' xmlns:context='http://www.springframework.org/schema/context' xsi:schemaLocation='http://www.springframework.org/schema/beans http://www.springframework.org/schema/beans/spring-beans.xsd http://www.springframework.org/schema/context https://www.springframework.org/schema/context/spring-context.xsd'> <context:component-scan base-package='org.yzytest1'></context:component-scan> <!--開啟包掃描--></beans>
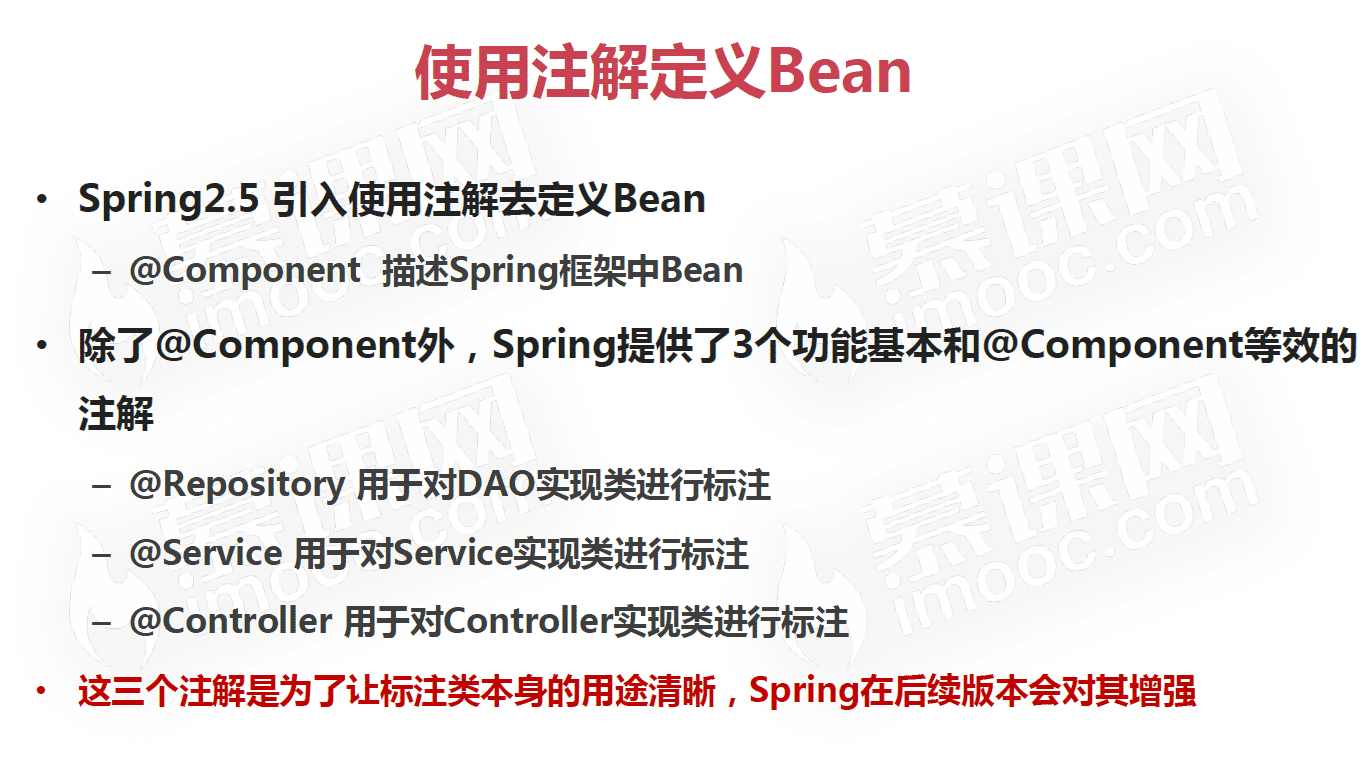
2.將類交給Spring管理:
@Component('Demo1') //使用注解Componentpublic class Demo1 { @Value('yzy') private String name; public void say(){ System.out.println('你好呀!'+name); }}
3.Spring的屬性注入:
普通的屬性注入,使用@Value屬性注入:
@Component('Demo1') public class Demo1 { @Value('yzy') //使用注解Value,屬性注入 private String name; public void say(){ System.out.println('你好呀!'+name); }}
復(fù)雜的屬性注入,使用@Resource屬性注入:
import org.springframework.stereotype.Component;import javax.annotation.Resource;@Component('Demo1')public class Demo1 { @Resource(name='User') //使用@Resource,屬性注入對(duì)象 private User user; public void say(){ System.out.println('你好呀!'+user.getUsername()); }}
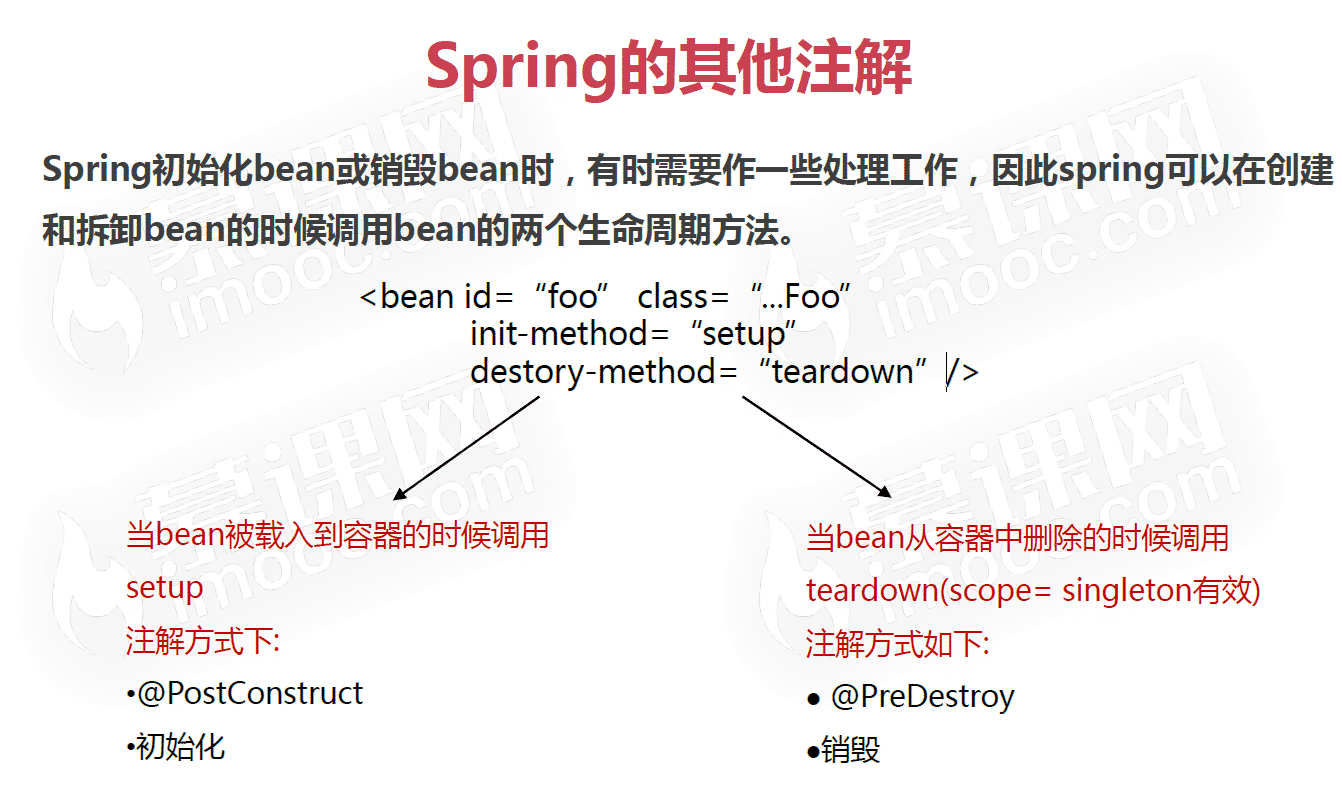
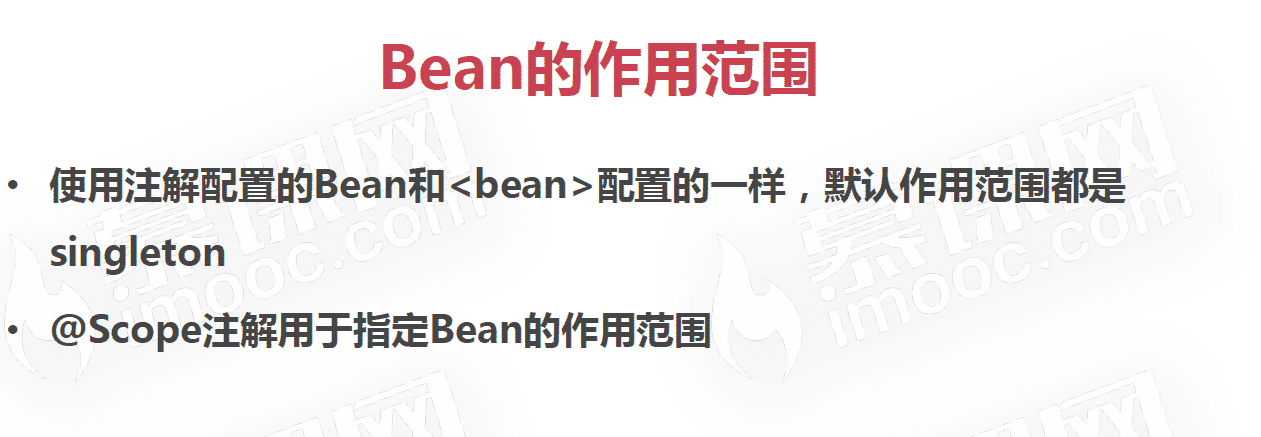
4.Spring的其他注解:
以上就是本文的全部內(nèi)容,希望對(duì)大家的學(xué)習(xí)有所幫助,也希望大家多多支持好吧啦網(wǎng)。
相關(guān)文章:
1. python爬蟲實(shí)戰(zhàn)之制作屬于自己的一個(gè)IP代理模塊2. 基于javaweb+jsp實(shí)現(xiàn)企業(yè)財(cái)務(wù)記賬管理系統(tǒng)3. 詳解盒子端CSS動(dòng)畫性能提升4. HTML 絕對(duì)路徑與相對(duì)路徑概念詳細(xì)5. css代碼優(yōu)化的12個(gè)技巧6. 使用FormData進(jìn)行Ajax請(qǐng)求上傳文件的實(shí)例代碼7. 如何在jsp界面中插入圖片8. .NET6打包部署到Windows Service的全過程9. asp批量添加修改刪除操作示例代碼10. 解決ajax請(qǐng)求后臺(tái),有時(shí)收不到返回值的問題

 網(wǎng)公網(wǎng)安備