Android 中使用RadioGroup和Fragment實(shí)現(xiàn)底部導(dǎo)航欄的功能
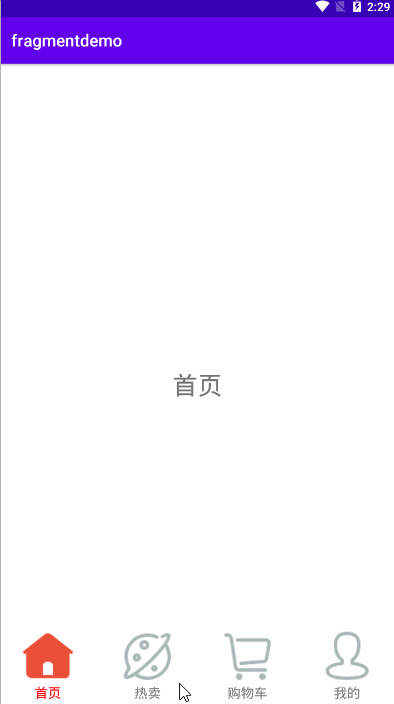
在一些購(gòu)物商城中經(jīng)常會(huì)遇到這類效果,效果圖如下:
先看效果圖
步驟一:完成對(duì)主界面main.xml的創(chuàng)建:
<?xml version='1.0' encoding='utf-8'?><RelativeLayout xmlns:android='http://schemas.android.com/apk/res/android' xmlns:app='http://schemas.android.com/apk/res-auto' xmlns:tools='http://schemas.android.com/tools' android:layout_width='match_parent' android:layout_height='match_parent' tools:context='.MainActivity'> <FrameLayoutandroid: android:layout_width='match_parent'android:layout_height='match_parent'android:layout_alignParentTop='true'/> <RadioGroupandroid:layout_width='match_parent'android:layout_height='wrap_content'android: android:layout_alignParentBottom='true'android:orientation='horizontal'><RadioButton android: android:layout_width='0dp' android:layout_height='match_parent' android:layout_weight='1' android:button='@null' android:drawableTop='@drawable/rb_home_selector' android:text='首頁(yè)' /><RadioButton android: android:layout_width='0dp' android:layout_height='match_parent' android:layout_weight='1' android:button='@null' android:drawableTop='@drawable/rb_discover_selector' android:text='熱賣(mài)' /><RadioButton android: android:layout_width='0dp' android:layout_height='match_parent' android:layout_weight='1' android:button='@null' android:drawableTop='@drawable/rb_cart_selector' android:text='購(gòu)物車' /><RadioButton android: android:layout_width='0dp' android:layout_height='match_parent' android:layout_weight='1' android:button='@null' android:drawableTop='@drawable/rb_user_selector' android:text='我的' /> </RadioGroup></RelativeLayout>
radioButton中重復(fù)使用的樣式:被抽取出來(lái)在style中寫(xiě)出
<style name='fragment'><item name='android:layout_width'>match_parent</item><item name='android:layout_height'>match_parent</item><item name='android:padding'>5dp</item><item name='android:gravity'>center</item><item name='android:textColor'>@drawable/rb_text_color</item><item name='android:textSize'>16sp</item><item name='android:textStyle'>normal</item> </style>
點(diǎn)擊RadioButton之后,導(dǎo)航欄文字顏色發(fā)生改變,聲明在drawable中名字為:rb_text_color代碼如下:
<?xml version='1.0' encoding='utf-8'?><selector xmlns:android='http://schemas.android.com/apk/res/android'> <item android:state_selected='true' android:color='#FF0000'/> <item android:color='#808080'/></selector>
導(dǎo)航欄圖標(biāo)發(fā)生變化這里只寫(xiě)其中一個(gè)其他三個(gè)都基本一樣:
<?xml version='1.0' encoding='utf-8'?><selector xmlns:android='http://schemas.android.com/apk/res/android'> <item android:drawable='@drawable/icon_cartfill_press' android:state_selected='true' /> <item android:drawable='@drawable/icon_cart' /></selector>
完成這些基本步驟之后,接下來(lái)就需要寫(xiě)Fragment的布局
<?xml version='1.0' encoding='utf-8'?><LinearLayout xmlns:android='http://schemas.android.com/apk/res/android' android:layout_width='match_parent' android:layout_height='match_parent' android:gravity='center'> <TextViewandroid: android:layout_width='wrap_content'android:layout_height='wrap_content'android:text='購(gòu)物車'android:textSize='30sp' /></LinearLayout>
寫(xiě)出其中一個(gè)另外三個(gè)類似。
之后后臺(tái)代碼中創(chuàng)建Fragment,這里也寫(xiě)其中一個(gè):CartFragment
package com.example.fragmentdemo;import android.os.Bundle;import android.view.LayoutInflater;import android.view.View;import android.view.ViewGroup;import android.widget.TextView;import androidx.annotation.NonNull;import androidx.annotation.Nullable;import androidx.fragment.app.Fragment;public class CartFragment extends Fragment { private View view; private TextView tv_home; @Nullable @Override public View onCreateView(@NonNull LayoutInflater inflater, @Nullable ViewGroup container, @Nullable Bundle savedInstanceState) {if (view==null){ view = inflater.inflate(R.layout.cart_fragment,container,false);}return view; }}
步驟二:在MainActivity中,完成對(duì)fragment的切換功能具體注釋已在代碼中給出。
package com.example.fragmentdemo;import androidx.appcompat.app.AppCompatActivity;import androidx.fragment.app.Fragment;import androidx.fragment.app.FragmentManager;import androidx.fragment.app.FragmentTransaction;import android.os.Bundle;import android.util.Log;import android.view.View;import android.widget.RadioButton;import android.widget.RadioGroup;import java.time.LocalDate;import java.util.ArrayList;import java.util.List;public class MainActivity extends AppCompatActivity implements RadioGroup.OnCheckedChangeListener { private RadioButton rb_home,rb_discover,rb_cart,rb_user; private RadioGroup rg_group; private List<Fragment> fragments; private int position=0; private static final String TAG = 'MainActivity'; @Override protected void onCreate(Bundle savedInstanceState) {super.onCreate(savedInstanceState);setContentView(R.layout.activity_main);rb_home=findViewById(R.id.rb_home);rb_discover=findViewById(R.id.rb_discover);rb_cart=findViewById(R.id.rb_cart);rb_user=findViewById(R.id.rb_user);rg_group=findViewById(R.id.rg_group);//默認(rèn)選中第一個(gè)rb_home.setSelected(true);rg_group.setOnCheckedChangeListener(this);//初始化fragmentinitFragment();//默認(rèn)布局,選第一個(gè)defaultFragment(); } private void defaultFragment() {FragmentManager fragmentManager = getSupportFragmentManager();FragmentTransaction transaction = fragmentManager.beginTransaction();transaction.replace(R.id.fragment_layout,fragments.get(0));transaction.commit(); } private void setSelected() {rb_home.setSelected(false);rb_discover.setSelected(false);rb_cart.setSelected(false);rb_user.setSelected(false); } private void initFragment() {fragments = new ArrayList<>();fragments.add(0,new HomeFragment());fragments.add(1,new DiscoverFragment());fragments.add(2,new CartFragment());fragments.add(3,new UserFragment()); } @Override public void onCheckedChanged(RadioGroup group, int i) {//獲取fragment管理類對(duì)象FragmentManager fragmentManager = getSupportFragmentManager();//拿到fragmentManager的觸發(fā)器FragmentTransaction transaction = fragmentManager.beginTransaction();switch (i){ case R.id.rb_home:position=0;//調(diào)用replace方法,將fragment,替換到fragment_layout這個(gè)id所在UI,或者這個(gè)控件上面來(lái)//這是創(chuàng)建replace這個(gè)事件,如果想要這個(gè)事件執(zhí)行,需要把這個(gè)事件提交給觸發(fā)器//用commit()方法transaction.replace(R.id.fragment_layout,fragments.get(0));//將所有導(dǎo)航欄設(shè)成默認(rèn)色setSelected();rb_home.setSelected(true);break; case R.id.rb_discover:position=1;transaction.replace(R.id.fragment_layout,fragments.get(1));//將所有導(dǎo)航欄設(shè)成默認(rèn)色setSelected();rb_discover.setSelected(true);break; case R.id.rb_cart:position=2;transaction.replace(R.id.fragment_layout,fragments.get(2));//將所有導(dǎo)航欄設(shè)成默認(rèn)色setSelected();rb_cart.setSelected(true);break; case R.id.rb_user:position=3;transaction.replace(R.id.fragment_layout,fragments.get(3));//將所有導(dǎo)航欄設(shè)成默認(rèn)色setSelected();rb_user.setSelected(true);break;}//事件的提交transaction.commit(); }}
這樣就完成了一個(gè)簡(jiǎn)單的底部導(dǎo)航欄功能,這個(gè)只能通過(guò)點(diǎn)擊切換fragment,不能通過(guò)左右滑動(dòng)去切換fragment。
以上就是Android 中使用RadioGroup+Fragment實(shí)現(xiàn)底部導(dǎo)航欄的功能的詳細(xì)內(nèi)容,更多關(guān)于android 底部導(dǎo)航欄的資料請(qǐng)關(guān)注好吧啦網(wǎng)其它相關(guān)文章!
相關(guān)文章:
1. moment轉(zhuǎn)化時(shí)間戳出現(xiàn)Invalid Date的問(wèn)題及解決2. python爬蟲(chóng)實(shí)戰(zhàn)之制作屬于自己的一個(gè)IP代理模塊3. 使用JSP技術(shù)實(shí)現(xiàn)一個(gè)簡(jiǎn)單的在線測(cè)試系統(tǒng)的實(shí)例詳解4. 為什么你的android代碼寫(xiě)得這么亂5. Android的線程和線程池6. Python中內(nèi)建模塊collections如何使用7. Python中matplotlib如何改變畫(huà)圖的字體8. python實(shí)現(xiàn)坦克大戰(zhàn)9. 開(kāi)發(fā)效率翻倍的Web API使用技巧10. 跟我學(xué)XSL(一)第1/5頁(yè)

 網(wǎng)公網(wǎng)安備